Keeping your art supplies organized can be a game-changer. You’ll spend less time hunting for materials and more time being creative. Here are some cool storage solutions that can really make a difference.
Storage bins are your best friend. Look for bins that stack on top of each other to save space. Clear ones let you see what you have at a glance, so you won’t have to dig through them. Use different bins for different types of supplies—paints in one, brushes in another, and papers in another. This way, everything has its place, and it’s easy to grab what you need.
Over-the-door shoe organizers work wonders too! These aren’t just for shoes; they’re perfect for holding a variety of supplies. Hang one on your studio door and fill the pockets with tubes of paint, scissors, or even small sketchbooks. It keeps everything visible, accessible, and adds a bit of flair to your space!
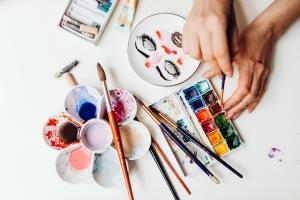
Don't overlook jars and containers. Repurpose old mason jars or small containers for storing brushes, pencils, or crayons. Label them if you want to keep things extra tidy. You can even paint the lids for a pop of color. It’s a fun way to personalize your setup while keeping everything organized.
If you want to get a bit crafty, use a rolling cart. Not only is it mobile, but it also provides tons of storage. You can use the top for your current projects and stash supplies below. Plus, you can roll it out of the way when you need your space back. It's a simple solution that adds flexibility to your art setup!
Keep Your Desk Clutter Free
Keeping your desk organized can feel like a challenge, especially when you're surrounded by all your favorite art supplies. But a tidy workspace can spark creativity and make it much easier to find what you need. Let’s explore some simple ways to keep your desk clutter-free!
Start with some small storage boxes. You can use clear ones to see exactly what’s inside or color-coded boxes to help categorize your supplies. Grouping similar items together makes it super easy to grab what you need. Think about using boxes for markers, paints, brushes, and other tools. You can stack them or slide them under your desk to save space.
Another great tip is to use a pegboard. Hang it on your wall and let your supplies hang out where you can see them. Use hooks for things like scissors and brushes. You can even hang small baskets for little items like washi tape or erasers. This keeps everything in view and right at your fingertips!
Don’t forget about utilizing drawer organizers. They’re perfect for keeping smaller items like pencils or pastels separated. You can customize your drawer space to fit your supplies perfectly. Getting everything in its spot means less time searching and more time creating.
Finally, think about going digital for some of your supplies. If you have a lot of instructional books or inspiration that you’re not using all the time, consider scanning them or saving them on your tablet. It saves physical space and keeps everything accessible when you need it. Remember, a clean desk leads to a clear mind. You’ll be amazed at how much your creativity can flow when your space is organized!
Easy DIY Storage Ideas
First up, try using mason jars. They’re perfect for holding small items like brushes, paint tubes, or pencils. You can even paint the jars or label them for a personal touch. Hang them on a wall or just line them up on a shelf. They’ll keep your supplies visible and easy to grab when inspiration strikes.
Another great idea is a pegboard. You can easily hang one on the wall and use hooks to hold scissors, rolls of tape, or any tools you use frequently. Pegboards are super customizable, so you can rearrange everything as needed. Plus, they look pretty cool too!
If you have leftover cardboard boxes, you can get creative by turning them into organizers. Cut them to size and decorate them to match your studio. Use these boxes to stash larger items, like sketch pads or canvases, and keep everything neat. Stack them up or slide them under your table for easy access.
Lastly, don’t forget about a rolling cart. These are fantastic for keeping everything mobile. You can easily push it to wherever you’re working and roll it out of the way when you’re done. Fill it with paints, brushes, and anything else you need on hand. Plus, it’s super convenient for moving around your space!
Smart Ways to Use Containers
Containers are a game changer when it comes to organizing your art supplies. You can use them in so many smart ways. Grab a few clear bins to separate your paints, brushes, and other tools. Being able to see what you've got makes it super easy to find the right color or the perfect brush without digging through everything.
Another great idea is to use recycled jars or containers. Old mason jars or spice containers work wonders for storing smaller items like beads, charcoal, or ink pens. Plus, they add a cute touch to your workspace! Just label each jar, and you’ll know exactly what’s inside. It’s all about easy access.
Don’t forget about using tiered storage like rolling carts or stackable bins. These options save space and keep everything easily reachable. You can wheel your supplies closer when you need them or tuck them away when you're done. It's practical and lets you customize your setup based on your current project.
Finally, think vertical. Wall-mounted containers or magnetic strips for tools can free up valuable desk space. Hang your scissors, paintbrushes, or palettes for a quick grab whenever inspiration strikes. Keeping everything within reach helps keep your creative flow going without the clutter.